Your Next Halloween Craft: The Layered Ghost Shadow Box Template
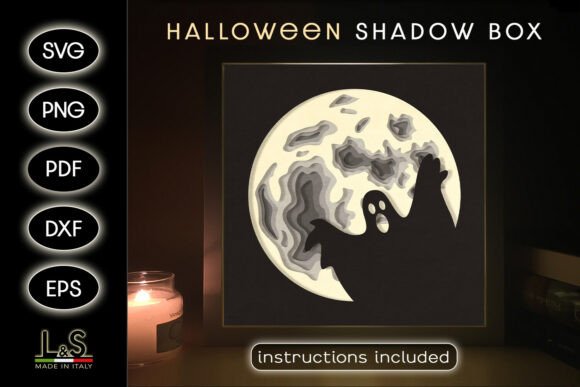
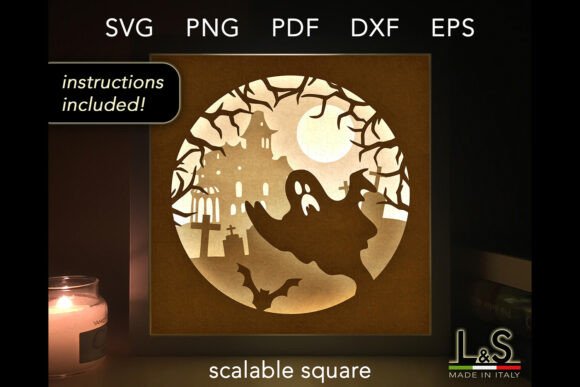
If you've ever admired the intricate depth and glowing ambiance of a paper shadow box, you’re likely intrigued by the process. The Halloween Ghost Shadow Box SVG offers a direct path to creating such a piece, a layered 3D scene featuring a haunting, whimsical ghost perfect for October decor. This digital template is designed primarily for light boxes, using white cardstock to let embedded LEDs shine through, creating a captivating glow. But its potential stretches far beyond that single use, and understanding its full scope—and a few common pitfalls—can transform it from a simple download into your next creative masterpiece.
Mistake One: Assuming It's Only for Light Boxes
A frequent oversight is treating the template as a one-trick pony. The description mentions light boxes, so many creators, especially beginners, lock into that single application. They might invest in a light box frame and LEDs without considering simpler, equally stunning alternatives. This limits both creativity and budget.
The better approach is to view the template as a versatile layered paper art foundation. The four distinct layers (typically a background, mid-ground, foreground, and the ghost figure) create depth regardless of lighting. You can skip the electronics entirely and assemble it as a beautiful, stand-alone 3D ornament. Try it on bold, colorful cardstock for a dramatic, non-glowing piece. Scale it down and adapt it into a unique, dimensional Halloween card. The SVG files' scalability in design software makes this easy. By ignoring the "primarily for" suggestion, you open up a wider range of projects.
Mistake Two: Not Matching the File Format to Your Tools and Skill Level
The template bundle is generous, containing SVG, PDF, PNG, DXF, and EPS files. A common error is hastily downloading and trying to open the ZIP file without a plan, leading to frustration. For instance, trying to open an SVG file in a basic photo editor, or attempting to use the DXF file with Cricut Design Space (which prefers SVG), will halt progress immediately.
Before you download, take a moment to audit your tools. If you use a cutting machine like a Cricut or Silhouette, the SVG files are your gold standard. They ensure clean, precise cuts with editable layers. If you prefer cutting by hand, the PDF files are your best friend—they are ready to print and use as a physical template. If you work in vector software like Adobe Illustrator, the EPS or SVG files offer professional editing control. Checking your software compatibility first saves time and prevents the "wrong file type" headache. Furthermore, if you are a beginner, do not overlook the included PDF instructions. They provide a detailed supply list and a simple tutorial, which is crucial for assembling the 4-layer structure correctly on your first attempt.
Mistake Three: Using the Wrong Material for Your Intended Outcome
The recommendation for white cardstock for light boxes is specific and practical—white allows light to diffuse evenly, creating a soft, ghostly illumination. A mistake here is using a thick, dark, or textured paper for a light box project, which will block light and muddle the effect. Conversely, for a non-lit shadow box or card, using a flimsy paper can result in a sagging, unstable structure.
Your material choice should directly support your final goal. For a successful light box: use a bright white, medium-weight cardstock (around 65-80 lb text weight). It’s sturdy enough to hold layers but translucent enough for light. For a decorative shadow box without lights: you can choose any color or patterned cardstock, but increase the weight (100 lb cover weight or higher) for durability. Always consider the cutting method too—hand-cutting thicker cardstock can be challenging, while machines like a Cricut handle it well. A quick test cut on a small scrap of your chosen paper can prevent wasted material and a disappointing final product.
Overlooked Detail: The Importance of Layer Order and Alignment
Even with perfect cuts and materials, assembly can falter. The 4-layer design creates depth through specific spacing. A rushed assembly, without following the guide, can lead to layers pressed flat together or stacked in the wrong order, destroying the 3D illusion. The ghost element, often the top layer, needs to sit forward to pop out from the background.
The corrective advice is methodical. Use the tutorial as a reference, but also employ simple registration marks. Before removing your cut pieces from the mat, lightly mark the corners or use the natural alignment points in the design. During assembly, use small dots of glue or double-sided tape and build from the back layer forward, checking the alignment of each new layer before adhering permanently. A small, temporary spacer (like a pencil tip) can help maintain a consistent gap between layers for that crucial shadow box depth.
Evaluating the Template Before Your Project Commitment
Before finalizing your decision to use this Halloween Ghost Shadow Box SVG, a few practical checks will set you up for success. First, verify the size. The design is 8x8 inches (20x20 cm), which is ideal for standard shadow box frames or as a sizable decor piece. Ensure your intended frame or display space matches this. Second, consider the cutting method. Do you have the tools (machine or steady hand) to cleanly cut the sometimes intricate details, like the ghost's ethereal form? Third, review the full bundle contents. Knowing you have multiple file formats means you can adapt the project later—maybe start with a hand-cut PDF version this year, and next year use the SVG with a new cutting machine.
Ultimately, this template is a gateway to personalized Halloween art. By avoiding the narrow view of its use, matching files to your toolkit, choosing materials intentionally, and assembling with care, you move past potential frustrations. Whether you create a softly glowing centerpiece, a vibrant card, or a colorful wall decoration, the layered ghost shadow box template provides the structure. Your creativity, informed by these practical considerations, builds the masterpiece.