Craft Your Own Zombie Halloween Shadow Box: A Guide to Smart Creation
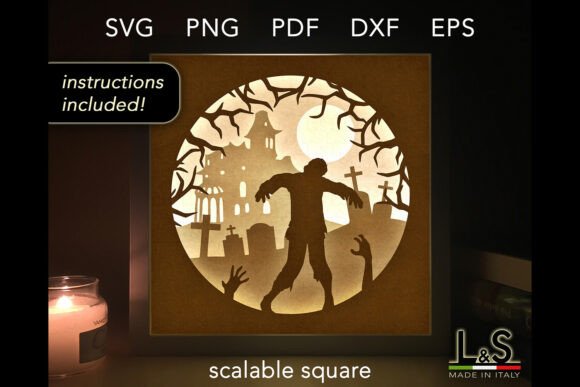
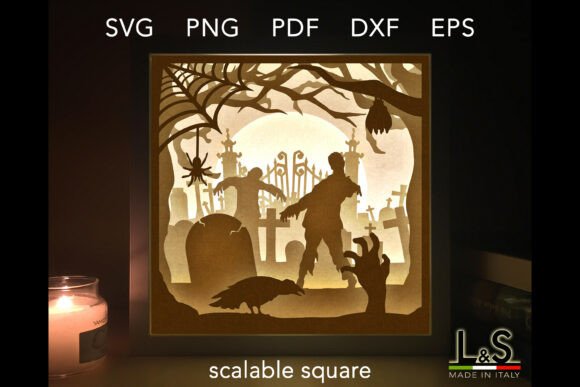
The eerie glow of a Halloween shadow box is a captivating decor piece, but crafting one from scratch can feel daunting. That’s where a Zombie Halloween Shadow Box SVG template becomes your secret weapon. This digital file bundle provides the precise layered artwork needed to build a stunning 3D scene, typically featuring a grisly zombie emerging from shadowy depths. It’s perfect for crafters wanting a professional-looking result without the hours of design work. Whether you're a hobbyist creating for your home, an entrepreneur selling handmade decor, or a blogger sharing DIY tutorials, this template unlocks a project that balances impressive visual impact with achievable assembly.
Choosing the Right Materials: A Common Pitfall
Many creators dive in with any cardstock they have on hand. The template often recommends white cardstock, specifically for light box applications. This isn't arbitrary. White or very light-colored paper allows LED lights to diffuse and illuminate the layers evenly, creating that perfect haunted glow. Using a dark or heavily patterned cardstock with a light box will absorb the illumination, resulting in a dim, muddy display. However, the advice “creativity has no limits” is valid. If you plan to make a shadow box without internal lights, or perhaps a unique Halloween card, then colored cardstock can be fantastic. The mistake is not aligning your material choice with your intended final use.
A better approach: Before you cut, decide on the function. For a traditional illuminated box, follow the recommendation. For a non-lit decorative piece or card, experiment with colors—perhaps muted greys or eerie greens to maintain the zombie theme. Always check the weight of your cardstock; too thin and the layers will warp, too thick and assembly becomes difficult. A good quality 65-80 lb cardstock is usually a reliable starting point.
The Overlooked Detail: File Format Confusion
The Zombie Halloween Shadow Box SVG template includes multiple file types: SVG, PDF, PNG, DXF, EPS. Beginners often grab the first file they see or assume all formats are identical for their cutting machine. This leads to frustration when a machine won’t import a file or a design doesn’t cut correctly. For instance, SVG files are ideal for most modern cutting machines like Cricut or Silhouette. However, if you use Silhouette Studio’s Basic Edition, you might need the provided DXF file. The PDFs are for manual printing and cutting, while PNGs offer high-resolution images for alternative uses.
How to avoid this: Before downloading, know your software and machine’s compatible formats. Scan the included file list and select the one that matches your workflow. If you intend to cut by hand, the PDF files are your best bet as they are already sized to the 8x8” (20x20cm) format. This simple pre-check saves time and prevents wasted materials.
Assembly Rush: Skipping the Tutorial
Even with pre-cut layers, assembly is a 3D puzzle. A common mistake, especially for experienced crafters, is to ignore the included PDF instructions and try to assemble by intuition. The five layers need to be stacked in a specific order and spaced correctly to achieve the proper depth and shadow effect. Assembling them incorrectly can make the zombie scene look flat, disjointed, or even unintentionally humorous. The tutorial is designed to get you to a perfect assembly in minutes, not hours.
Practical advice: Treat the tutorial as your map. Lay out all your cut layers and the required supplies—like adhesive foam dots or spacers—before you start. Follow the sequence step-by-step. This ensures your masterpiece looks as intended and your satisfaction with the final product is high.
Machine Cutting Without a Test
If you’re using the ready-to-cut files for your Cricut, Silhouette, Brother, CNC laser, or other machine, jumping straight to cutting the final design on your chosen cardstock is tempting. However, blade depth, pressure, and material settings vary. A misconfigured cut can ruin a sheet of paper or, worse, damage a delicate layer detail. This affects both cost (wasted materials) and project momentum.
A corrective step: Always perform a test cut on a small, similar piece of scrap paper. Use a simple shape from the file or the smallest layer to verify your settings. This minute of precaution ensures the intricate zombie details—like fragile fingers or facial features—cut cleanly and completely on your final material.
Underestimating the Power of Adaptation
The template is a starting point, not a rigid rulebook. A misunderstanding is viewing it only as a light box project. As noted, you can try it without lights, use colorful cardstock, or make a unique Halloween card. Limiting yourself to one outcome misses creative opportunities. For example, using a single layer from the set on a black cardstock background can create a striking, simpler Halloween greeting card perfect for selling or sending.
Embrace variation: Look at the files not just as a single project, but as a component library. The PNG files with transparent backgrounds are particularly useful for this; they can be imported into other design software to create digital artwork, party invitations, or web graphics. This approach maximizes the value of your download, especially for entrepreneurs and content creators.
Final Checks Before You Begin
To ensure a smooth process from download to display, make these quick verifications. First, confirm you have software to unzip the single ZIP file—all the formats are compressed inside. Second, ensure your cutting machine blades or laser optics are clean and sharp for a precise cut. Third, gather all physical supplies listed in the instructions before assembly: the right adhesive, any frames or light boxes if used, and a clean workspace. Finally, consider your end goal. Is this for personal decor, a gift, or a product sample? That decision will guide your material choices and time investment, helping you use the Zombie Halloween Shadow Box SVG template not just correctly, but cleverly.
By sidestepping these common missteps, you transform a digital download into a physical masterpiece efficiently and effectively. The layered zombie Halloween shadow box template is a tool designed for both beginners and professionals to achieve a stunning result. Your attention to the practical details of format, material, and assembly unlocks its full potential, letting you focus on the joy of creating something truly hauntingly beautiful.